
Gemma는 Gemini 모델을 만드는 데 사용된 것과 동일한 연구 및 기술로 개발된 개방형 모델 제품군입니다. Gemma 모델은 텍스트 생성, 코드 완성 및 생성, 특정 작업의 미세 조정, 다양한 기기에서의 실행을 포함하여 광범위한 작업을 수행할 수 있습니다.
Ray는 AI 및 Python 애플리케이션을 확장하기 위한 오픈소스 프레임워크입니다. Ray는 머신러닝(ML) 워크플로에 대한 분산형 계산과 병렬 처리를 수행하기 위한 인프라를 제공합니다.
이 튜토리얼을 마칠 때 즈음이면 Vertex AI의 Ray에서 Gemma Supervised 튜닝을 사용하여 머신러닝 모델을 효율적이고 효과적으로 학습 및 제공하는 방법을 확실하게 이해할 수 있을 것입니다.
GitHub의 'Vertex AI의 Ray에서 Gemma 시작하기' 튜토리얼 노트북을 탐색하여 Ray에서의 Gemma에 대해 자세히 알아볼 수 있습니다. 탐색 여정이 더 수월해지도록 이 노트북에 아래의 모든 코드를 담았습니다.
환경에 관계없이 다음 단계는 필수입니다.
3. API를 활성화합니다.
이 튜토리얼을 로컬에서 실행하는 경우 Cloud SDK를 설치해야 합니다.
이 튜토리얼에서는 Google Cloud의 청구 가능한 구성요소를 사용합니다.
요금 책정에 대해 알아보고 가격 계산기를 사용하여 예상 사용량을 기준으로 비용 추정치를 계산하세요.
추상적인 단일 문서 요약 시스템에 대한 데이터 세트인 XSum(Extreme Summarization) 데이터 세트를 사용하겠습니다.
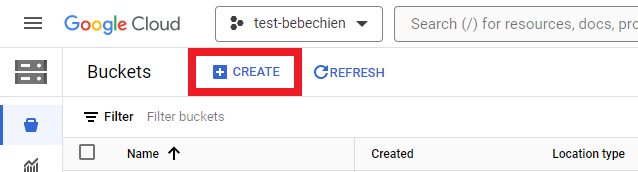
데이터 세트와 같은 중간 아티팩트를 저장하기 위해 스토리지 버킷을 생성해야 합니다.
또는 Google Cloud CLI 사용
gsutil mb -l {REGION} -p {PROJECT_ID} {BUCKET_URI}
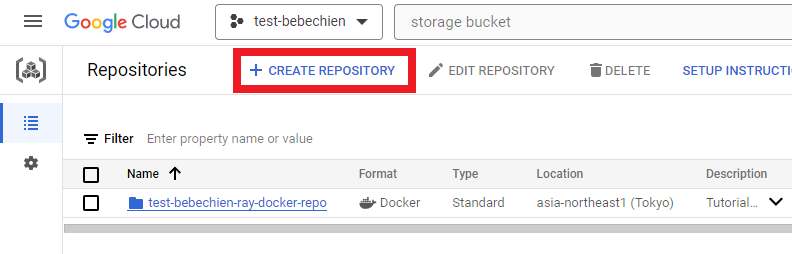
# 예: gsutil mb -l asia-northeast1 -p test-bebechien gs://test-bebechien-ray-bucket사용자 설정 클러스터 이미지를 저장하려면 Artifact Registry에 Docker 저장소를 만드세요.
또는 Google Cloud CLI 사용
gcloud artifacts repositories create your-repo --repository-format=docker --location=your-region --description="Tutorial repository"텐서보드 인스턴스는 튜닝 작업을 추적하고 모니터링하기 위한 것입니다. Experiments에서 텐서보드 인스턴스를 만들 수 있습니다.

또는 Google Cloud CLI 사용
gcloud ai tensorboards create --display-name your-tensorboard --project your-project --region your-regionVertex AI에서 Ray를 시작하려면 처음부터 사용자 설정 이미지에 대한 Dockerfile을 만들거나 미리 빌드된 Ray 기본 이미지 중 하나를 활용할 수 있습니다. 이러한 기본 이미지는 여기에서 구할 수 있습니다.
먼저, Ray 애플리케이션이 실행해야 하는 종속성이 포함된 요구 사항 파일을 준비합니다.
그다음, Vertex AI에서 미리 빌드된 Ray 기본 이미지 중 하나를 활용하여 사용자 설정 이미지의 Dockerfile을 만듭니다.
마지막으로 Cloud Build를 사용하여 Ray 클러스터 사용자 설정 이미지를 빌드합니다.
gcloud builds submit --region=your-region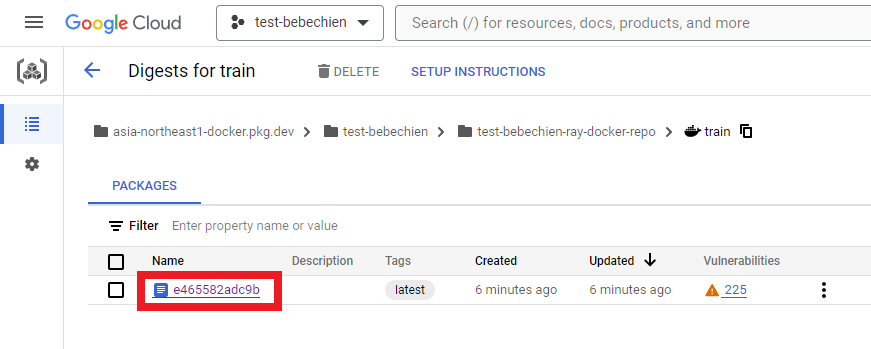
--tag=your-region-docker.pkg.dev/your-project/your-repo/train --machine-type=E2_HIGHCPU_32 ./dockerfile-path모든 것이 순조롭게 진행되면 사용자 설정 이미지가 도커 이미지 저장소로 푸시된 것을 볼 수 있습니다.
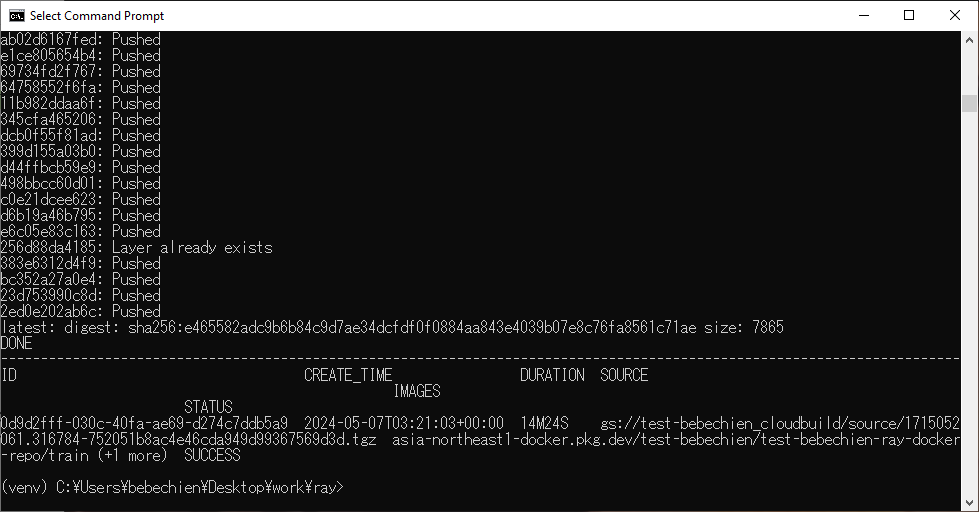
또한 Artifact Registry에서 다음을 수행합니다.
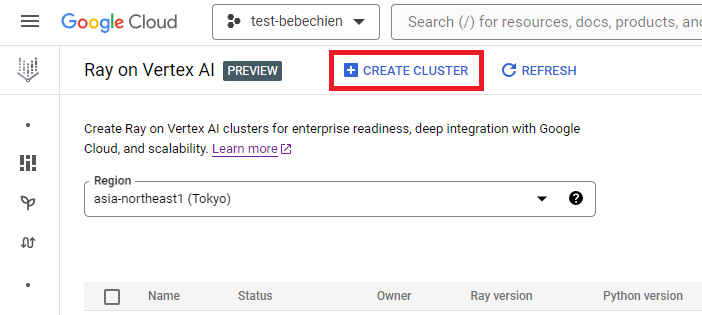
Vertex AI의 Ray에서 Ray 클러스터를 만들 수 있습니다.
또는 Vertex AI Python SDK를 사용하여 사용자 설정 이미지가 있는 Ray 클러스터를 만들고 클러스터 구성을 사용자 설정합니다. 클러스터 구성에 대한 자세한 내용은 설명서를 참조하세요.
다음은 미리 정의된 사용자 설정 구성으로 Ray 클러스터를 만드는 Python 코드 예시입니다.
참고: 구성에 따라 클러스터를 만드는 데 몇 분 정도 걸릴 수 있습니다.
# Vertex Ai에서 Ray 설정
import vertex_ray
from google.cloud import aiplatform as vertex_ai
from vertex_ray import NodeImages, Resources

# 텐서보드 ID가 주어진 기존 관리형 텐서보드 검색
tensorboard = vertex_ai.Tensorboard(your-tensorboard-id, project=your-project, location=your-region)

# 프로젝트를 위해 Python용 Vertex AI SDK 초기화
vertex_ai.init(project=your-project, location=your-region, staging_bucket=your-bucket-uri, experiment_tensorboard=tensorboard)


HEAD_NODE_TYPE = Resources(
    machine_type= "n1-standard-16",
    node_count=1,
)

WORKER_NODE_TYPES = [
    Resources(
        machine_type="n1-standard-16",
        node_count=1,
        accelerator_type="NVIDIA_TESLA_T4",
        accelerator_count=2,
    )
]

CUSTOM_IMAGES = NodeImages(
    head="your-region-docker.pkg.dev/your-project/your-repo/train",
    worker="your-region-docker.pkg.dev/your-project/your-repo/train",
)

ray_cluster_name = vertex_ray.create_ray_cluster(
    head_node_type=HEAD_NODE_TYPE,
    worker_node_types=WORKER_NODE_TYPES,
    custom_images=CUSTOM_IMAGES,
    cluster_name=”your-cluster-name”,
)이제 get_ray_cluster()로 Ray 클러스터를 가져올 수 있습니다. 프로젝트와 관련된 모든 클러스터를 보려면 list_ray_clusters()를 사용하세요.
ray_clusters = vertex_ray.list_ray_clusters()
ray_cluster_resource_name = ray_clusters[-1].cluster_resource_name
ray_cluster = vertex_ray.get_ray_cluster(ray_cluster_resource_name)

print("Ray cluster on Vertex AI:", ray_cluster_resource_name)Vertex AI에서 Ray로 Gemma를 미세 조정하기 위해서는 아래에서 보듯 PyTorch 학습으로 HuggingFace Transformer를 배포하는 Ray Train을 사용하면 됩니다.
Ray Train을 사용하여, 배포하려는 Gemma를 조정하기 위한 HuggingFace Transformer 코드를 포함하는 학습 함수를 정의합니다. 다음으로, 원하는 작업자 수를 지정하고 분산 학습 프로세스에 GPU의 필요 여부를 나타내는 확장 구성을 정의합니다. 또한 검사점 및 동기화 동작을 지정하는 런타임 구성도 정의합니다. 마지막으로, TorchTrainer를 시작하여 미세 조정을 제출하고 fit 메서드를 사용하여 이를 실행합니다.
이 튜토리얼에서는 Vertex Ai의 Ray에서 HuggingFace Transformer를 사용하여 신문 기사를 요약하는 Gemma 2B(gemma-2b-it)를 미세 조정해 보겠습니다. 간단한 Python trainer.py 스크립트를 작성해서 이를 Ray 클러스터에 제출하도록 하겠습니다.
학습 스크립트를 작성해 보겠습니다. 아래는 HuggingFace TRL 라이브러리를 사용해 Gemma 미세 조정을 초기화하는 Python 스크립트 예시입니다.
다음으로, 분산된 학습 스크립트를 작성합니다. 아래는 Ray 분산 학습 작업을 실행하는 Python 스크립트 예시입니다.
이제 Ray 대시보드 주소를 통해 Ray Jobs API를 사용하여 Ray 클러스터에 스크립트를 제출합니다. 아래처럼 클러스터 세부 정보 페이지에서 대시보드 주소를 찾을 수도 있습니다.
먼저, 클라이언트를 시작하여 작업을 제출합니다.
import ray
from ray.job_submission import JobSubmissionClient

client = JobSubmissionClient(
    address="vertex_ray://{}".format(ray_cluster.dashboard_address)
)모델 경로, 작업 ID, 예측 진입점 등을 포함한 몇 가지 작업 구성을 설정해 보겠습니다.
import random, string, datasets, transformers
from etils import epath
from huggingface_hub import login


# 일부 라이브러리 설정 초기화
login(token=”your-hf-token”)
datasets.disable_progress_bar()
transformers.set_seed(8)

train_experiment_name = “your-experiment-name”
train_submission_id = “your-submission-id”
train_entrypoint = f"python3 trainer.py --experiment-name={train_experiment_name} --logging-dir=”your-bucket-uri/logs” --num-workers=2 --use-gpu"
train_runtime_env = {
    "working_dir": "your-working-dir",
    "env_vars": {"HF_TOKEN": ”your-hf-token”, "TORCH_NCCL_ASYNC_ERROR_HANDLING": "3"},
}작업 제출
train_job_id = client.submit_job(
    submission_id=train_submission_id,
    entrypoint=train_entrypoint,
    runtime_env=train_runtime_env,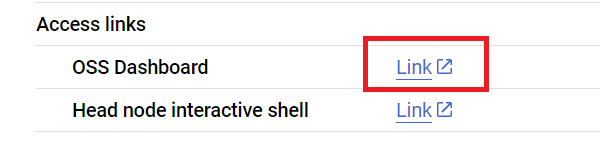
)OSS 대시보드에서 작업 상태를 확인합니다.

Vertex AI에서 Ray를 사용하여 AI/ML 애플리케이션을 개발하면 여러 가지 장점이 있습니다. 이 시나리오에서는 Cloud Storage를 사용하여 모델 검사점과 측정항목 등을 편리하게 저장할 수 있습니다. 이를 통해 Vertex AI 텐서보드를 사용한 학습 프로세스 모니터링 또는 Ray Data를 사용한 배치 예측 생성 등 AI/ML 다운스트림 작업에 모델을 빠르게 사용할 수 있습니다.
Ray 학습 작업이 실행되는 중에 그리고 학습 작업이 완료된 후에 Google Cloud CLI 사용 시 Cloud Storage 위치에 모델 아티팩트가 표시됩니다.
gsutil ls -l your-bucket-uri/your-experiments/your-experiment-name결과 측정항목을 로깅하여 학습 작업 검증을 위해 Vertex AI 텐서보드를 사용할 수 있습니다.
vertex_ai.upload_tb_log(
    tensorboard_id=tensorboard.name,
    tensorboard_experiment_name=train_experiment_name,
    logdir=./experiments,
)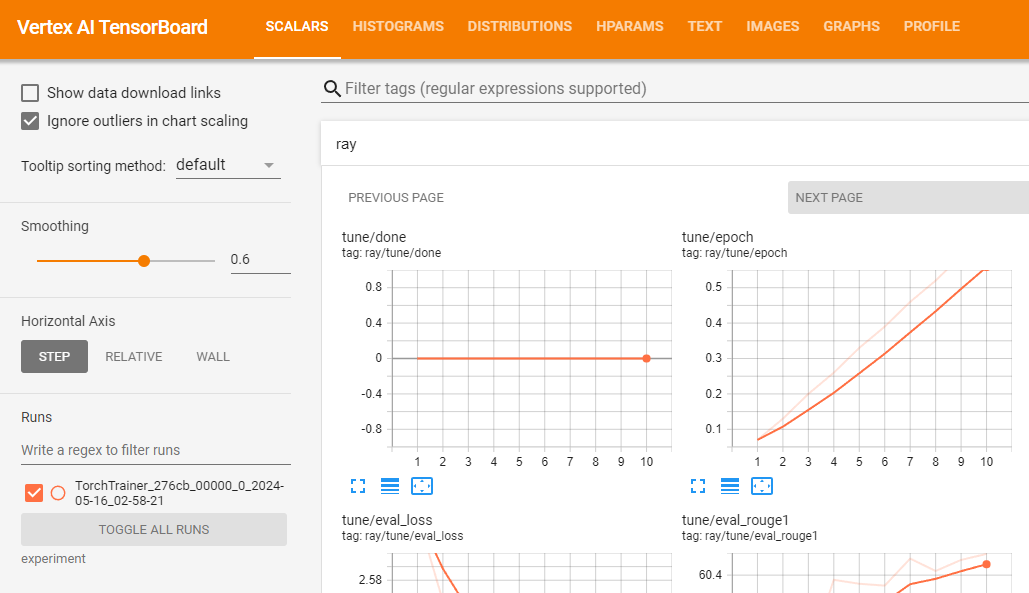
학습이 성공적으로 실행된다고 가정하면 로컬에서 예측을 생성하여 조정된 모델을 검증할 수 있습니다.
먼저 Google Cloud CLI를 사용하여 Ray 작업에서 모든 결과 검사점을 다운로드합니다.
# 모든 아티팩트 복사
gsutil ls -l your-bucket-uri/your-experiments/your-experiment-name ./your-experiment-pathExperimentAnalysis 메서드를 사용하여 관련 측정항목과 모드에 따라 최적의 검사점을 검색합니다.
import ray
from ray.tune import ExperimentAnalysis

experiment_analysis = ExperimentAnalysis(“./your-experiment-path”)
log_path = experiment_analysis.get_best_trial(metric="eval_rougeLsum", mode="max")
best_checkpoint = experiment_analysis.get_best_checkpoint(
    log_path, metric="eval_rougeLsum", mode="max"
)이제 최적의 검사점을 찾았습니다. 아래에 출력 예시입니다.

그리고 Hugging Face 설명서에 설명된 대로 미세 조정된 모델을 로드합니다.
다음은 기본 모델을 로드하고 어댑터를 기본 모델에 병합하는 Python 코드 예시입니다. 이를 통해 이 모델을 일반 트랜스포머 모델처럼 사용할 수 있습니다. 저장된 조정 모델은 tuned_model_path에서 찾을 수 있습니다. (예: 'tutorial/models/xsum-tuned-gemma-it').
import torch
from etils import epath
from transformers import AutoModelForCausalLM, AutoTokenizer
from peft import PeftModel

base_model_path = "google/gemma-2b-it"
peft_model_path = epath.Path(best_checkpoint.path) / "checkpoint"
tuned_model_path = models_path / "xsum-tuned-gemma-it"

tokenizer = AutoTokenizer.from_pretrained(base_model_path)
tokenizer.padding_side = "right"

base_model = AutoModelForCausalLM.from_pretrained(
    base_model_path, device_map="auto", torch_dtype=torch.float16
)
peft_model = PeftModel.from_pretrained(
    base_model,
    peft_model_path,
    device_map="auto",
    torch_dtype=torch.bfloat16,
    is_trainable=False,
)

tuned_model = peft_model.merge_and_unload()
tuned_model.save_pretrained(tuned_model_path)Tidbit: 모델을 미세 조정했으므로 다음 한 줄의 코드를 사용하여 Hugging Face Hub에 모델을 게시할 수도 있습니다.
tuned_model.push_to_hub("my-awesome-model")튜토리얼 데이터 세트의 검증 세트를 사용하여 조정된 모델로 요약을 생성해 보겠습니다.
아래 Python 코드 예제에서는 데이터 세트에서 요약할 기사 하나를 샘플링하는 방법을 보여줍니다. 그다음에는 관련 요약을 생성하고 데이터 세트의 참조 요약과 생성된 요약을 모두 나란히 인쇄합니다.
import random, datasets
from transformers import pipeline
dataset = datasets.load_dataset(
"xsum", split="validation", cache_dir=”./data”, trust_remote_code=True
)
sample = dataset.select([random.randint(0, len(dataset) - 1)])
document = sample["document"][0]
reference_summary = sample["summary"][0]
messages = [
{
"role": "user",
"content": f"Summarize the following ARTICLE in one sentence.\n###ARTICLE: {document}",
},
]
prompt = tokenizer.apply_chat_template(
messages, tokenize=False, add_generation_prompt=True
)
tuned_gemma_pipeline = pipeline(
"text-generation", model=tuned_model, tokenizer=tokenizer, max_new_tokens=50
)
generated_tuned_gemma_summary = tuned_gemma_pipeline(
prompt, do_sample=True, temperature=0.1, add_special_tokens=True
)[0]["generated_text"][len(prompt) :]
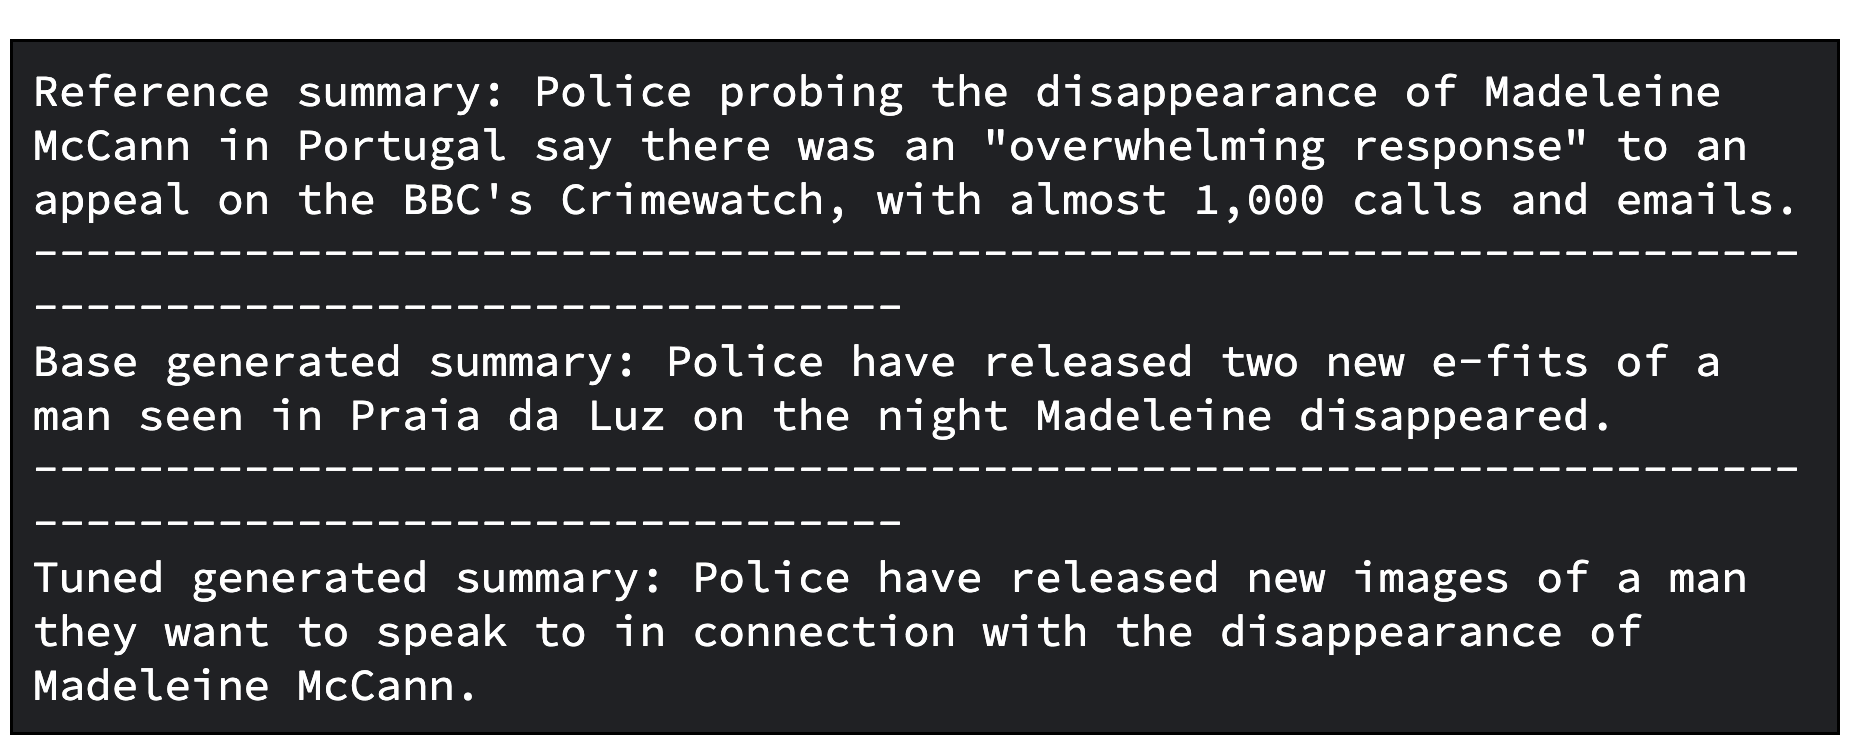
print(f"Reference summary: {reference_summary}")
print("-" * 100)
print(f"Tuned generated summary: {generated_tuned_gemma_summary}")다음은 조정된 모델의 출력 예시입니다. 조정된 결과를 더 정제해야 할 수도 있습니다. 최적의 품질을 얻기 위해서는 학습 속도와 학습 단계의 수 등 다양한 요소를 조정하여 프로세스를 여러 번 반복해야 합니다.
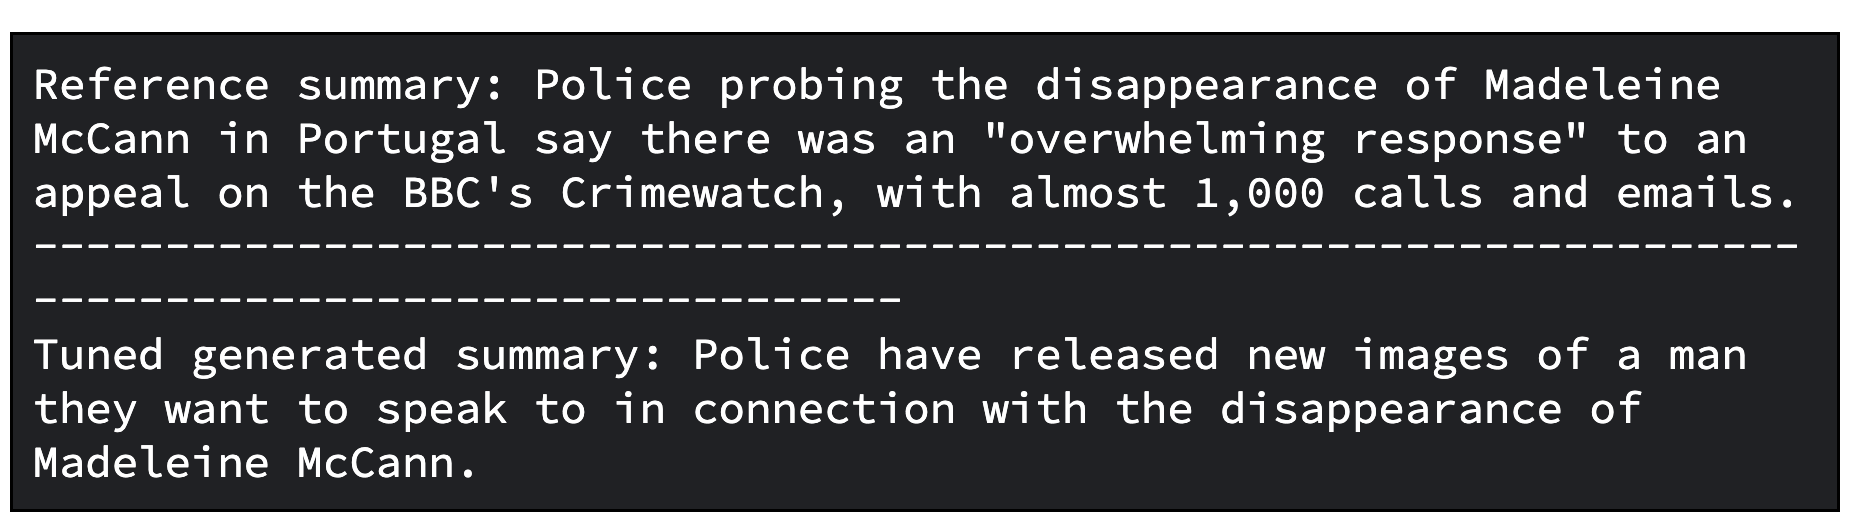
추가 단계로서, 조정된 모델을 평가할 수 있습니다. 모델 평가를 위해 모델을 정성적, 정량적으로 비교합니다.
한 케이스에서는 기본 Gemma 모델로 생성한 응답을 조정된 Gemma 모델로 생성한 응답과 비교합니다. 다른 케이스에서는 ROUGE 측정항목과 개선율을 계산하여 조정된 모델이 기본 모델에 비해 얼마나 잘 참조 요약을 올바르게 재현하는지 파악합니다.
다음은 생성된 요약을 비교하여 모델을 평가하는 Python 코드입니다.
gemma_pipeline = pipeline(
    "text-generation", model=base_model, tokenizer=tokenizer, max_new_tokens=50
)

generated_gemma_summary = gemma_pipeline(
    prompt, do_sample=True, temperature=0.1, add_special_tokens=True
)[0]["generated_text"][len(prompt) :]

print(f"Reference summary: {reference_summary}")
print("-" * 100)
print(f"Base generated summary: {generated_gemma_summary}")
print("-" * 100)
print(f"Tuned generated summary: {generated_tuned_gemma_summary}")다음은 기본 모델과 조정된 모델의 출력 예시입니다.
그리고 다음은 ROUGE 측정항목과 개선율을 계산하여 모델을 평가하는 코드입니다.
import evaluate

rouge = evaluate.load("rouge")

gemma_results = rouge.compute(
    predictions=[generated_gemma_summary],
    references=[reference_summary],
    rouge_types=["rouge1", "rouge2", "rougeL", "rougeLsum"],
    use_aggregator=True,
    use_stemmer=True,
)

tuned_gemma_results = rouge.compute(
    predictions=[generated_tuned_gemma_summary],
    references=[reference_summary],
    rouge_types=["rouge1", "rouge2", "rougeL", "rougeLsum"],
    use_aggregator=True,
    use_stemmer=True,
)

improvements = {}
for rouge_metric, gemma_rouge in gemma_results.items():
    tuned_gemma_rouge = tuned_gemma_results[rouge_metric]
    if gemma_rouge != 0:
        improvement = ((tuned_gemma_rouge - gemma_rouge) / gemma_rouge) * 100
    else:
        improvement = None
    improvements[rouge_metric] = improvement

print("Base Gemma vs Tuned Gemma - ROUGE improvements")
for rouge_metric, improvement in improvements.items():
print(f"{rouge_metric}: {improvement:.3f}%")그리고 평가를 위한 출력 예시입니다.

Vertex AI의 Ray에서 조정된 Gemma로 대규모 오프라인 예측을 생성하려면 ML 워크로드를 위해 확장 가능한 데이터 처리 라이브러리인 Ray Data를 사용하면 됩니다.
Gemma로 오프라인 예측을 생성하는 Ray Data를 사용하여 Hugging Face Pipeline에서 조정된 모델을 로드하도록 Python 클래스를 정의해야 합니다. 그런 다음 데이터 소스와 형식에 따라 Ray Data를 사용하여 분산 데이터 읽기를 수행하고 Ray 데이터 세트 메서드를 사용하여 여러 데이터 배치에 병렬로 예측을 수행하는 Python 클래스를 적용합니다.
Vertex AI에서 Ray Data를 사용하여 조정된 모델로 배치 예측을 생성하려면 예측 생성을 위한 데이터 세트와 Cloud 버킷에 저장된 조정된 모델이 필요합니다.
그런 다음 오프라인 배치 추론을 위해 사용이 쉬운 API를 제공하는 Ray Data를 활용할 수 있습니다.
먼저 Google Cloud CLI를 사용하여 Cloud Storage에 조정된 모델을 업로드합니다.
gsutil -q cp -r “./models” “your-bucket-uri/models”Ray 배치 예측 작업을 실행하기 위해 배치 예측 학습 스크립트 파일을 준비합니다.
다시 한번, 클라이언트를 시작하여 Ray 대시보드 주소를 통해 Ray Jobs API를 사용하여 아래와 같이 작업을 제출할 수 있습니다.
import ray
from ray.job_submission import JobSubmissionClient

client = JobSubmissionClient(
    address="vertex_ray://{}".format(ray_cluster.dashboard_address)
)모델 경로, 작업 ID, 예측 진입점 등을 포함한 몇 가지 작업 구성을 설정해 보겠습니다.
import random, string

batch_predict_submission_id = "your-batch-prediction-job"
tuned_model_uri_path = "/gcs/your-bucket-uri/models"
batch_predict_entrypoint = f"python3 batch_predictor.py --tuned_model_path={tuned_model_uri_path} --num_gpus=1 --output_dir=”your-bucket-uri/predictions”"
batch_predict_runtime_env = {
    "working_dir": "tutorial/src",
    "env_vars": {"HF_TOKEN": “your-hf-token”},
}'--num_gpus' 인수와 함께 사용할 GPU 수를 지정할 수 있습니다. 이 수는 Ray 클러스터에서 사용할 수 있는 GPU 수보다 작거나 같은 값이어야 합니다.
그리고 작업을 제출합니다.
batch_predict_job_id = client.submit_job(
    submission_id=batch_predict_submission_id,
    entrypoint=batch_predict_entrypoint,
    runtime_env=batch_predict_runtime_env,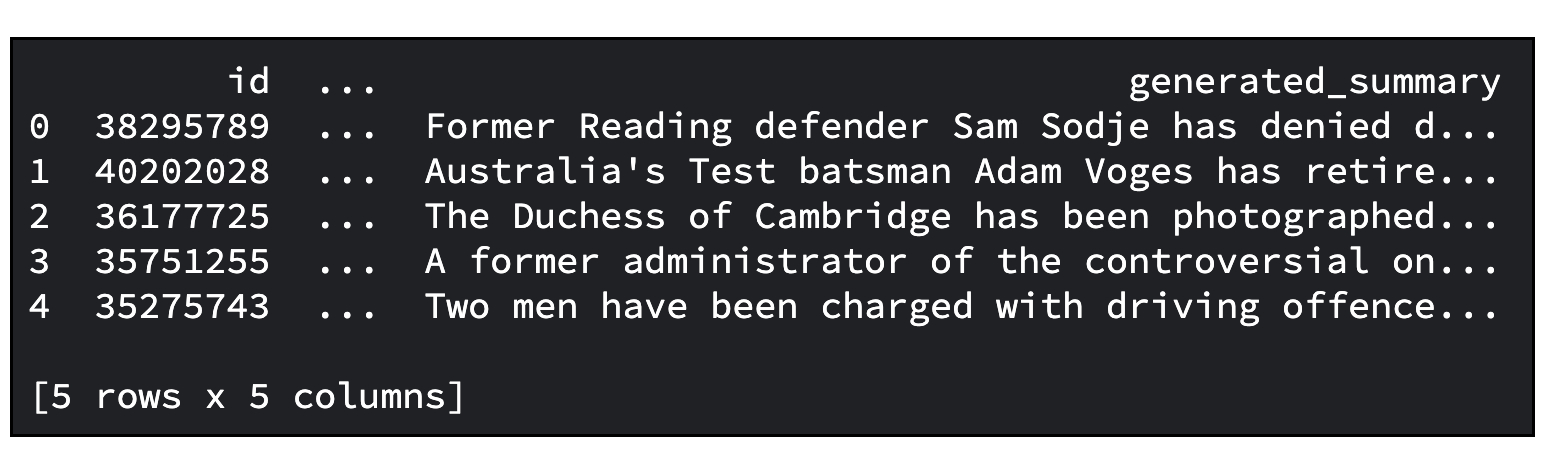
)생성된 요약을 Pandas DataFrame을 사용하여 간략히 살펴보겠습니다.
import io
import pandas as pd
from google.cloud import storage

def read_json_files(bucket_name, prefix=None):
    """Cloud Storage 버킷에서 JSON 파일을 읽고 Pandas DataFrame을 반환합니다"""

    # 스토리지 클라이언트 설정
    storage_client = storage.Client()
    bucket = storage_client.bucket(bucket_name)
    blobs = bucket.list_blobs(prefix=prefix)

    dfs = []

    for blob in blobs:
        if blob.name.endswith(".json"):
            file_bytes = blob.download_as_bytes()
            file_string = file_bytes.decode("utf-8")
            with io.StringIO(file_string) as json_file:
                df = pd.read_json(json_file, lines=True)
            dfs.append(df)

    return pd.concat(dfs, ignore_index=True)

predictions_df = read_json_files(prefix="predictions/", bucket_name=”your-bucket-uri”)
predictions_df = predictions_df[
    ["id", "document", "prompt", "summary", "generated_summary"]
]
predictions_df.head()아래는 출력 예시입니다. 요약할 기사의 기본 개수는 20개입니다. '--sample_size' 인수로 숫자를 지정할 수 있습니다.
지금까지 다음 내용을 포함한 많은 것을 배우셨습니다.
이 튜토리얼을 통해 이해의 폭이 넓어지고 귀한 배움을 얻으셨기를 바랍니다.
Google 개발자 커뮤니티 Discord 서버에 가입해 보세요. 프로젝트를 공유하고 다른 개발자와 소통하며 협업 토론에 참여할 기회를 누릴 수 있습니다.
그리고 이 프로젝트에 사용된 모든 Google Cloud 리소스를 꼭 깨끗하게 정리하세요. 튜토리얼에 사용한 Google Cloud 프로젝트를 삭제하는 간단한 방법이 있습니다. 그 외에, 생성한 개별 리소스를 삭제하는 방법도 있습니다.
# 텐서보드 삭제
tensorboard_list = vertex_ai.Tensorboard.list()
for tensorboard in tensorboard_list:
    tensorboard.delete()

# 실험 삭제
experiment_list = vertex_ai.Experiment.list()
for experiment in experiment_list:
    experiment.delete()

# ray on vertex 클러스터 삭제
ray_cluster_list = vertex_ray.list_ray_clusters()
for ray_cluster in ray_cluster_list:
vertex_ray.delete_ray_cluster(ray_cluster.cluster_resource_name)# 아티팩트 저장소 삭제
gcloud artifacts repositories delete “your-repo” -q
# 생성된 Cloud Storage 객체 삭제
gsutil -q -m rm -r “your-bucker-uri”
Announcing the Data Commons Gemini CLI extension
Grain 및 ArrayRecord를 사용하여 고성능 데이터 파이프라인 구축

EmbeddingGemma 출시: 온디바이스 임베딩을 위한 동급 최고의 개방형 모델

Gemma 3 270M 소개: 초효율적인 AI를 위한 콤팩트 모델
Building with Gemini 3 in Jules

LangChain4j 통합을 통해 타사 언어 모델에도 개방되는 자바용 ADK