Posted by Wesley Chun (@wescpy), Developer Advocate, Google Cloud

Google Cloud offers three distinct ways of running your code or application in a serverless way, each serving different use cases. Google App Engine, our first Cloud product, was created to give users the ability to deploy source-based web applications or mobile backends directly to the cloud without the need of thinking about servers or scaling. Cloud Functions came later for scenarios where you may not have an entire app, great for one-off utility functions or event-driven microservices. Cloud Run is our latest fully-managed serverless product that gives developers the flexibility of containers along with the convenience of serverless.
As all are serverless compute platforms, users recognize they share some similarities along with clear differences, and often, they ask:
We're going to answer these questions today by sharing a unique application with you, one that can be deployed to all three platforms without changing any application code. All of the necessary changes are done in configuration.
Another challenge for developers can be trying to learn how to use another Cloud product, such as this request, paraphrased from a user:
Sounds simple enough. This user went straight to the App Engine and Translation API documentation where they were able to get started with the App Engine Quickstart to get their app up and going, then found the Translation API setup page and started looking into permissions needed to access the API. However, they got stuck at the Identity and Access Management (IAM) page on roles, being overwhelmed at all the options but no clear path forward. In light of this, let's add a third question to preceding pair outlined earlier:

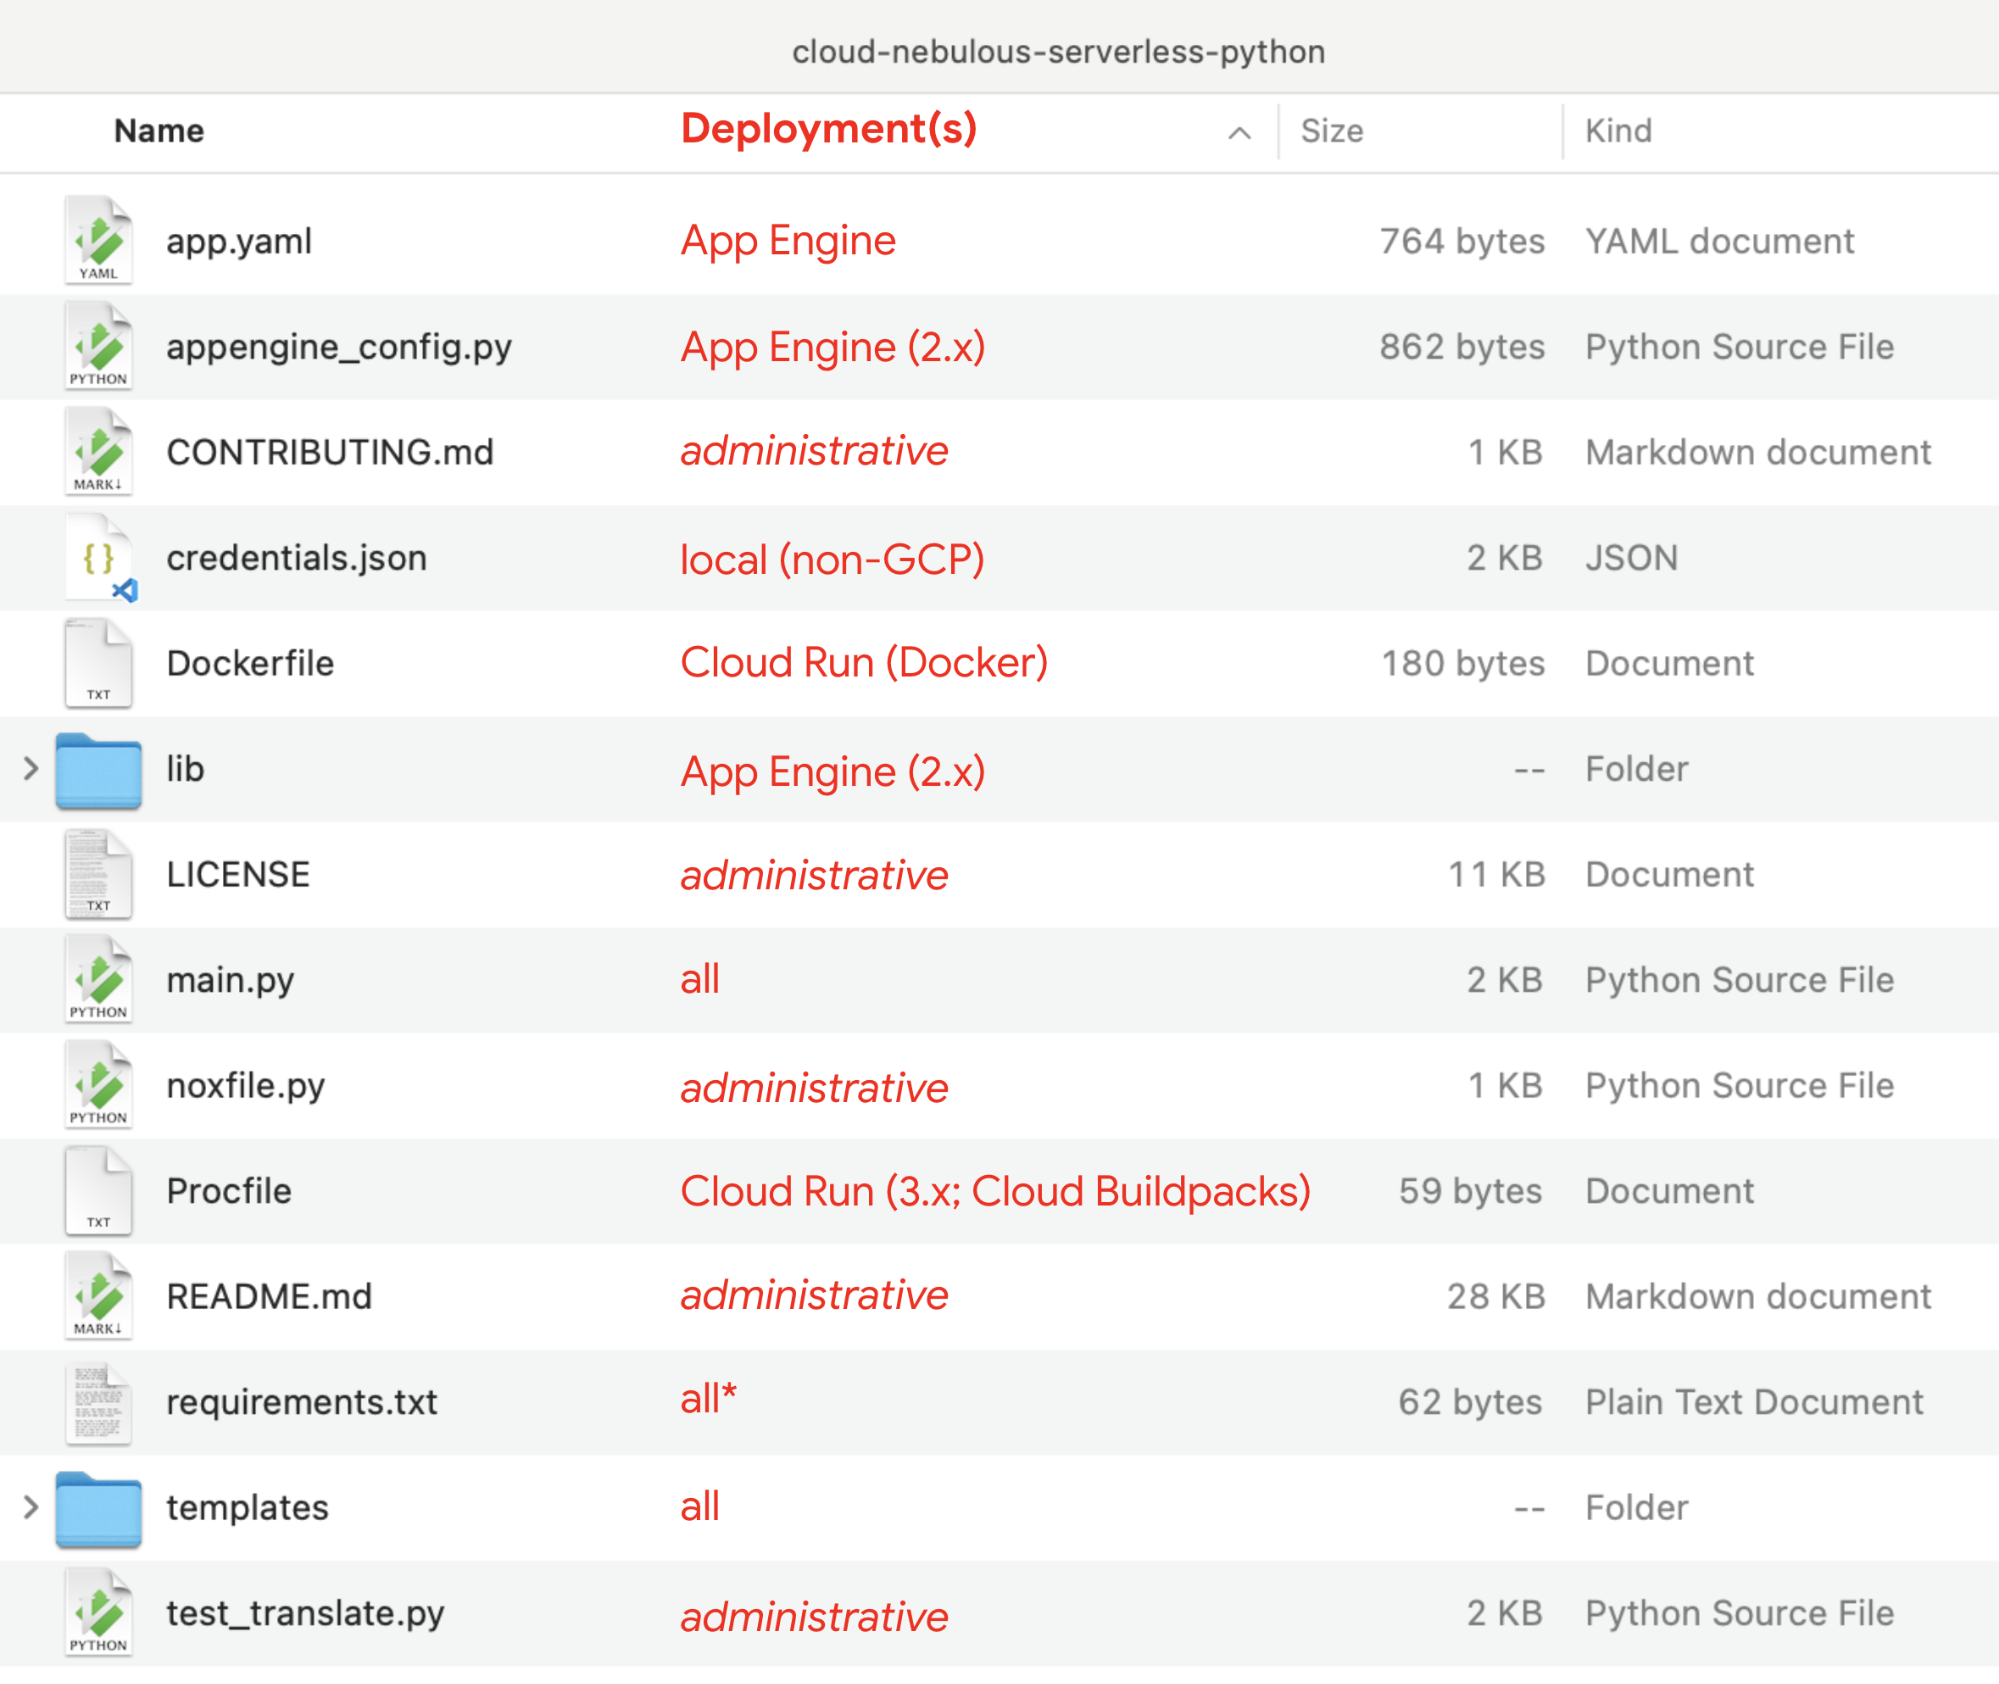
Nebulous serverless sample app files
Diving straight into the application, let's look at its primary function,translate():
@app.route('/', methods=['GET', 'POST'])
      def translate(gcf_request=None):
      local_request = gcf_request if gcf_request else request
      text = translated = None
      if local_request.method == 'POST':
      text = local_request.form['text'].strip()
      if text:
      data = {
      'contents': [text],
      'parent': PARENT,
      'target_language_code': TARGET[0],
      }
      rsp = TRANSLATE.translate_text(request=data)
      translated = rsp.translations[0].translated_text
      context = {
      'orig': {'text': text, 'lc': SOURCE},
      'trans': {'text': translated, 'lc': TARGET},
      }
      return render_template('index.html', **context)
Core component (translate())
of sample application
ifdef" for Cloud Functions
near the top to receive a request object because a web framework isn't used like you'd have
with App Engine or Cloud Run, so Cloud Functions provides one for this reason.
requirements.txt file* is used in all
configurations, whether to install third-party packages locally, or to direct the Cloud Build system to automatically install
those libraries during deployment. Beyond requirements.txt, things
start to differ:
app.yaml
file and possibly an appengine_config.py file.
Dockerfile (Docker) or Procfile (Cloud
Buildpacks), and possibly a service.yaml file.
requirements.txt, package.json, etc.).

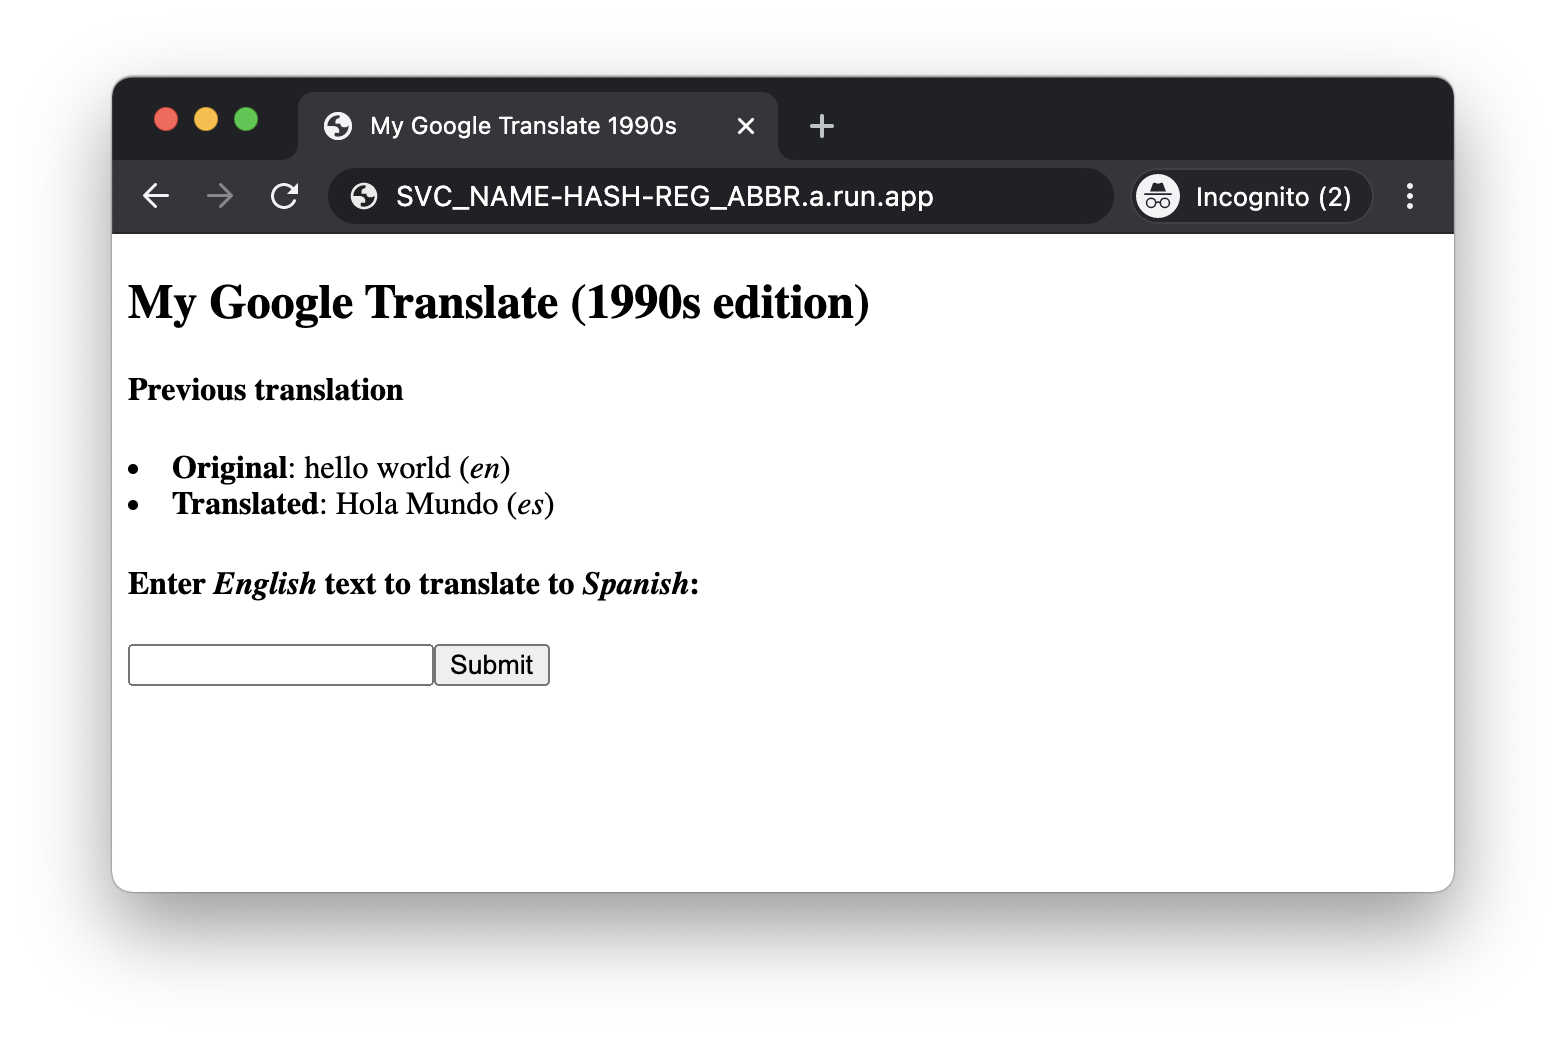
"My Google Translate" MVP app (Cloud Run edition)
The user described earlier was overwhelmed at all the IAM roles and options available because this type of detail is required to provide the most security options for accessing Cloud services, but when prototyping, the fastest on-ramp is to use the default service account that comes with Cloud serverless platforms. These help you get that prototype working while allowing you to learn more about IAM roles and required permissions. Once you've progressed far enough to consider deploying to production, you can then follow the best practice of "least privileges" and create your own (user-managed) service accounts with the minimal permissions required so your application functions properly.
To dive in, the code and codelabs (free, self-paced, hands-on tutorials) for each deployment are available in its open source repository. An active Google Cloud billing account is required to deploy this application to each of our serverless platforms even though you can do all of them without incurring charges. More information can be found in the "Cost" section of the repo'sREADME.
We hope this sample app teaches you more about the similarities and differences between our
plaforms, shows you how you can "shift" applications comfortably between them, and provides a
light introduction to another Cloud API. Also check out my colleague's post
featuring similar content for Node.js.